Modern software development isn’t just about writing code; it’s about meeting the demands of speed, scalability and reliability in a rapidly changing technological landscape. Users expect frequent updates and seamless performance, and organizations are under pressure to deliver all this without compromising stability.
That’s why CI/CD pipelines have become essential. By automating and streamlining development, testing and deployment, these pipelines not only speed up delivery cycles but also minimize manual errors and boost overall software quality.
If you’re looking to stay ahead, this tutorial is your roadmap to mastering CI/CD in a way that’s practical and highly relevant for today’s cloud native environments. I’ll walk you through building your own scalable CI/CD pipeline using GitHub Actions for continuous integration and Argo CD for continuous deployment.
With this guide, you’ll create an end-to-end solution to automate the build, test and deployment processes for a real-world use case: a Kubernetes-based Node.js REST API that returns the current time. By the end, you won’t just understand CI/CD pipelines; you’ll know how to implement them effectively and take your development workflow to the next level.
Setting Up the Environment
Before diving into the implementation, ensure you have the following:
- Kubernetes cluster: A working Kubernetes cluster (e.g., Minikube, AKS EKS or Google GKE).
- GitHub repository: A repository containing your application’s source code.
- Container registry: Access to a Docker container registry (e.g., Docker Hub or AWS ECR)
- Command-line interface (CLI) tools: kubectl, Docker and Argo CD CLI installed..
This tutorial uses the following real-world example:
- Application: A Node.js REST API that returns the current time. This application was chosen for its simplicity and clarity, making it an ideal example for demonstrating CI/CD workflows. Its lightweight structure allows you to focus on pipeline automation without the complexities of managing a large codebase, while still being representative of real-world deployment scenarios.
- Repository: kubernetes-ci-cd-demo
- Container Registry: Docker Hub (<Your-dockerhub-username>/current-time-api).
To follow along, start by forking the repository and cloning it to your local computer. This will allow you to make changes to the code and push them back to your GitHub account.
Implementing CI With GitHub Actions
Step 1: GitHub Workflow File
The GitHub Actions workflow is defined within the .github/workflows/directory of your repository. This directory contains the CI configuration files. Inside this directory, you typically create a file named ci-pipeline.yml to define your CI pipeline.
When changes are pushed to the repository, it triggers the GitHub Actions workflow. The workflow consists of a job called build-and-push. This job performs the following tasks:
- Check out code: It checks out the latest version of the code from the repository.
- Set up Node.js environment: It configures the Node.js environment required to run the project.
- Install dependencies: It installs all necessary project dependencies.
- Run tests: It executes tests to ensure that the code is running correctly and without errors.
- Log Into Docker hub: It logs into Docker Hub to allow for image building and pushing.
- Build and push Docker image: It builds a Docker image for the current application (in this case, a time API) and pushes the image to Docker Hub.
This Docker image will later be deployed to a Kubernetes cluster, which is managed by an Argo CD continuous deployment pipeline.
Step 2: Define the CI Pipeline
Here are the contents of the workflow:
name: CI Pipeline
on:
  push:
    branches:
      - main
jobs:
  build-and-push:
    runs-on: ubuntu-latest
    steps:
      - name: Checkout Code
        uses: actions/checkout@v3
      - name: Set up Node.js
        uses: actions/setup-node@v3
        with:
          node-version: '16'
      - name: Install Dependencies
        run: npm install
      - name: Run Tests
        run: npm test
      - name: Log in to Docker Hub
        run: echo ${{ secrets.DOCKER_PASSWORD }} | docker login -u ${{ secrets.DOCKER_USERNAME }} --password-stdin
      - name: Build and Push Docker Image
        run: |
          docker build -t <Your-DockerHub-Username>/current-time-api:${{ github.sha }} .
          docker tag <Your-DockerHub-Username>/current-time-api:${{ github.sha }} <Your-DockerHub-Username>/current-time-api:latest
          docker push <Your-DockerHub-Username>/current-time-api:${{ github.sha }}
          docker push <Your-DockerHub-Username>/current-time-api:latest
Integrating Argo CD for Continuous Deployment
Step 1: Install Argo CD in Your Kubernetes Cluster
Argo CD is a declarative, GitOps continuous delivery tool for Kubernetes. It enables automated deployments and version control of your Kubernetes manifests by syncing them with your Git repository. Installing Argo CD gives you a powerful platform for managing and automating application rollouts and lifecycles within your Kubernetes cluster. To begin, execute the following commands:
kubectl create namespace argocd

kubectl apply -n argocd -f https://raw.githubusercontent.com/argoproj/argo-cd/stable/manifests/install.yaml
To verify that Argo CD was successfully installed on your Kubernetes cluster, run the kubectl command:
kubectl get all -n argocd
The command will display all the resources in the argocd namespace. Here is an example of the results.
NAME                                                   READY   STATUS    RESTARTS   AGE
pod/argocd-application-controller-0                    1/1     Running   0          155m
pod/argocd-applicationset-controller-764744455-7zpwz   1/1     Running   0          155m
pod/argocd-dex-server-78df54498c-fkzsg                 1/1     Running   0          155m
pod/argocd-notifications-controller-577b87f4bd-5btn2   1/1     Running   0          155m
pod/argocd-redis-564c8b4dd7-8b8vk                      1/1     Running   0          155m
pod/argocd-repo-server-6858df88f4-xtgs8                1/1     Running   0          155m
pod/argocd-server-74b5b78785-5twr4                     1/1     Running   0          155m

NAME                                              TYPE        CLUSTER-IP       EXTERNAL-IP   PORT(S)                      AGE
service/argocd-applicationset-controller          ClusterIP   10.108.143.77    <none>        7000/TCP,8080/TCP            155m
service/argocd-dex-server                         ClusterIP   10.110.187.94    <none>        5556/TCP,5557/TCP,5558/TCP   155m
service/argocd-metrics                            ClusterIP   10.102.187.226   <none>        8082/TCP                     155m
service/argocd-notifications-controller-metrics   ClusterIP   10.103.165.1     <none>        9001/TCP                     155m
service/argocd-redis                              ClusterIP   10.103.187.225   <none>        6379/TCP                     155m
service/argocd-repo-server                        ClusterIP   10.98.60.104     <none>        8081/TCP,8084/TCP            155m
service/argocd-server                             ClusterIP   10.101.52.110    <none>        80/TCP,443/TCP               155m
service/argocd-server-metrics                     ClusterIP   10.110.0.116     <none>        8083/TCP                     155m

NAME                                               READY   UP-TO-DATE   AVAILABLE   AGE
deployment.apps/argocd-applicationset-controller   1/1     1            1           155m
deployment.apps/argocd-dex-server                  1/1     1            1           155m
deployment.apps/argocd-notifications-controller    1/1     1            1           155m
deployment.apps/argocd-redis                       1/1     1            1           155m
deployment.apps/argocd-repo-server                 1/1     1            1           155m
deployment.apps/argocd-server                      1/1     1            1           155m

NAME                                                         DESIRED   CURRENT   READY   AGE
replicaset.apps/argocd-applicationset-controller-764744455   1         1         1       155m
replicaset.apps/argocd-dex-server-78df54498c                 1         1         1       155m
replicaset.apps/argocd-notifications-controller-577b87f4bd   1         1         1       155m
replicaset.apps/argocd-redis-564c8b4dd7                      1         1         1       155m
replicaset.apps/argocd-repo-server-6858df88f4                1         1         1       155m
replicaset.apps/argocd-server-74b5b78785                     1         1         1       155m

NAME                                             READY   AGE
statefulset.apps/argocd-application-controller   1/1     155m
Step 2: Access the Argo CD User Interface (UI)
Now that you have Argo CD installed, it’s time to expose the Argo CD UI so that you can access it through the web. To do this, run the following kubectl command:
kubectl port-forward svc/argocd-server -n argocd 8080:443
You should see the following on the terminal. You must keep this terminal running continuously to serve the site.
Forwarding from 127.0.0.1:8080 -> 8080

Forwarding from [::1]:8080 -> 8080
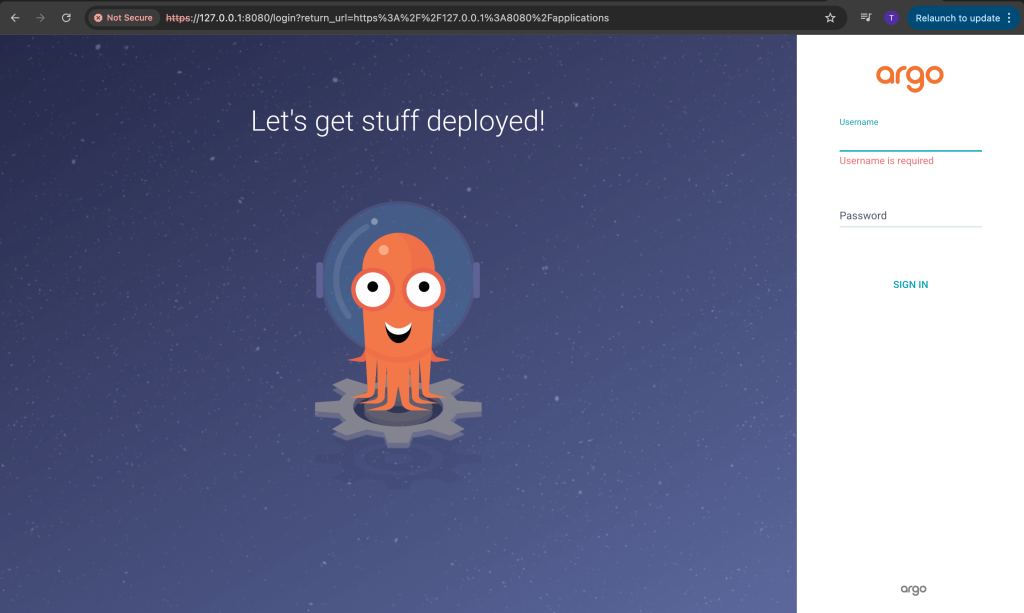
Access the Argo CD UI using the URL provided for your environment (https://127.0.0.1:8080 in the example above). Note: Your access URL may be different from this, depending on your specific setup and configuration. Make sure to use the correct URL provided for your environment.
This will be the first page you see when you open the URL in your browser.
Step 3: Configure Argo CD
1. Log in to Argo CD:
After launching the Argo CD UI, the next step is to log in for the first time. The default username in Argo CD is admin. To retrieve the password for the admin user, you can run the following command. Ensure that you have the Argo CD CLI installed on your computer before executing this command.
argocd admin initial-password -n argocd
Once you have the password and admin username, you can log in to the Argo CD UI. After logging in, it is recommended to change the default password to one that is easier for you to remember.
2. Add Your GitHub Repository to Argo CD:
The next step is to add your GitHub repository to Argo CD. You can configure it either through the Argo CD CLI or directly via the web UI. I will guide you through the process using the web UI.
- Navigate to the Settings section in Argo CD.
- Under the Repositories tab, you will find options to add a new repository.
- Here, you can configure your GitHub repository by providing the necessary details.
This is what the Repositories section looks like in the Argo CD UI.

If the setup is successful, you should see a green check mark next to your GitHub repository, indicating that it has been connected successfully. If there is an issue, you will see a connection failure error message, indicating that the GitHub repository failed to connect.
The next optional step at this stage is the cluster configuration. By default, the cluster where Argo CD is installed is automatically configured during installation. Any additional Kubernetes clusters should be added through the Cluster Configuration section in the UI.
Keep in mind that most of these configurations can also be done using the Argo CD CLI, so you can choose to use either the CLI or the web UI — both options achieve the same goal.
Step 4: Create an Application in Argo CD
Define an application in a YAML file. This application definition serves as the bridge between your GitHub repository and your Kubernetes cluster within the Argo CD workflow. It tells Argo CD what to deploy, where to deploy it and which configurations to use. The application YAML specifies the repository URL, branch and path for the Kubernetes manifests, as well as the destination cluster and namespace. This ensures that your deployment process is automated and repeatable. Here’s the YAML definition:
apiVersion: argoproj.io/v1alpha1
kind: Application
metadata:
  name: current-time-api
  namespace: argocd
spec:
  source:
    repoURL: https://<Your-Github-Repo-Url> # Use your forked github repo of this project.
    targetRevision: main
    path: manifests
  destination:
    server: https://<Your-kubernetes-Server> # Use your own cluster server
    namespace: default
  project: default
To create your first application on the Argo CD platform, use the kubectl apply command at the end of this step. Before running the command, make sure to update the repoURL and server values to match your correct GitHub repository URL and the correct cluster URL.
This command will create the application on Argo CD. Ensure that the repository URL points to your GitHub repository, and the server URL corresponds to the Kubernetes cluster that you want the application to deploy.
kubectl apply -f app.yaml
Step 5: Deploy the Node.js REST API
The last step is pushing the sample Kubernetes manifest to your repository.
This manifest is a YAML configuration file that defines the Kubernetes resources necessary to deploy your application. It specifies a Deploymentand outlines the desired state for your pods, such as the number of replicas, container images and port configurations.
By pushing this file to your repository, you enable Argo CD to monitor the repository for changes and automatically deploy or update your application based on the latest configurations. Here’s the example manifest:
apiVersion: apps/v1
kind: Deployment
metadata:
name: current-time-api
labels:
app: current-time-api
spec:
replicas: 2
selector:
matchLabels:
app: current-time-api
template:
metadata:
labels:
app: current-time-api
spec:
containers:
- name: current-time-api
image: tinegaonchari/current-time-api:latest
ports:
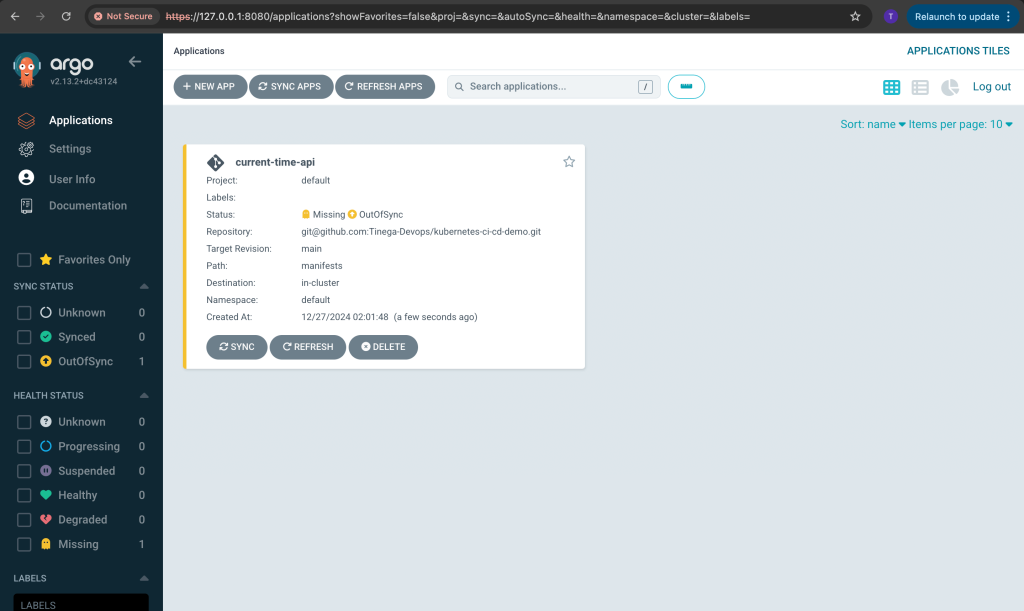
- containerPort: 3000Argo CD will automatically detect the changes and deploy the application. Here is an example of how the application looks.

Best Practices for CI/CD With Kubernetes
By leveraging GitHub Actions for CI and Argo CD for CD, you’ve built a robust, scalable pipeline tailored for Kubernetes deployments. This setup streamlines your development process, allowing for faster iterations without sacrificing reliability. The Node.js REST API application serves as a practical example of how this pipeline can be applied in real-world projects.
Here are some best practices for doing CI/CD with Kubernetes:
- Secrets management: Use tools like HashiCorp Vault or Kubernetes Secrets to manage sensitive information securely. HashiCorp Vault provides robust methods for securing, storing and tightly controlling access to secrets such as API keys, passwords and certificates. Kubernetes Secrets, on the other hand, allow you to store and manage sensitive information directly within the Kubernetes ecosystem. Integrating these tools into your CI/CD pipeline ensures that sensitive data is protected throughout the pipeline’s lifecycle. For example, you can use GitHub Actions to reference these secrets securely without hardcoding them into your repository. This approach minimizes risks and improves compliance with security best practices.
- Monitoring: Implement observability with tools like Prometheus and Grafana to monitor your pipeline.
- Testing: Include unit tests and integration tests in your CI pipeline.
- Rollback strategies: Use Argo CD’s built-in rollback features to handle failed deployments.
Conclusion
From here, you can take it even further. Consider exploring advanced techniques like blue-green deployments or canary releases to push your pipeline’s capabilities to the next level.
About the author: Tinega Onchari
Tinega is a Senior DevOps Engineer and a technologist for Andela, a private global marketplace for tech talent. Tinega began his tech career in 2018 after completing the Google Africa Developer Scholarship, Andela’s learning program in partnership with Google. Tinega is an expert in cloud technologies, AWS, Azure, and APIs, with a specialization in implementing CI/CD pipelines.