For this blog tutorial we will be going through the steps of uploading several images in one export package using Node.js, Express.js, and Cloudinary. This article does assume that you already have working knowledge with Node.js and Javascript, so we will not discuss the concept of persisting data in a database.
You will need to have Node.js installed on your computer, so if you don't take a minute to download and install. If you do have the program already installed, you also need to have an account on Cloudinary. It is a quick and easy installation if you don't already have an account.
Once all programs are installed, we need to make sure that we have a project set up. To do so, open the terminal and run these commands:
$ mkdir myAPP && cd myApp/
$ npm init
$ npm install --save express cloudinary multer body-parser nodemon
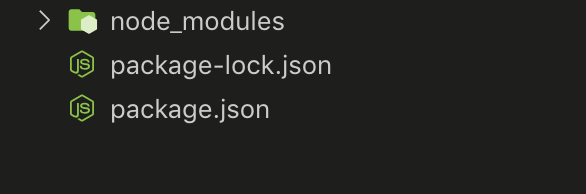
Once the sequence of commands are loaded, the folder structure you see on your machine should look similar to this:
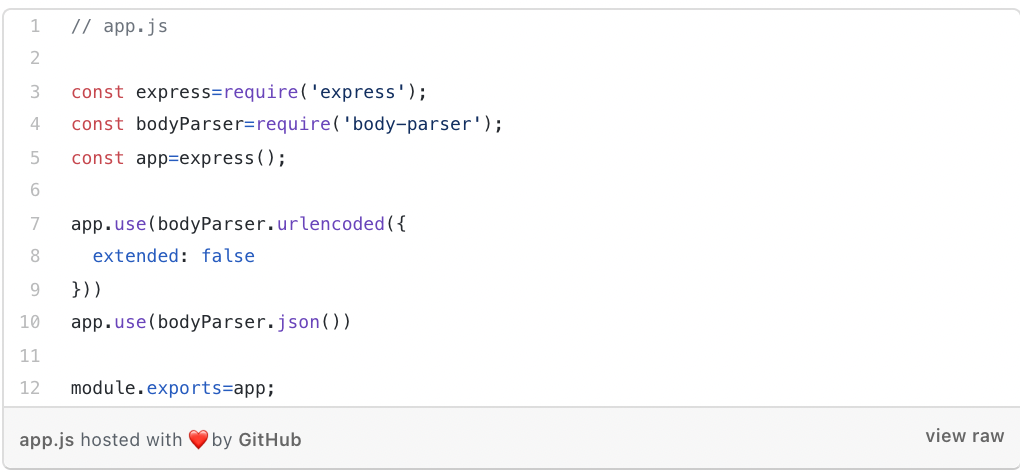
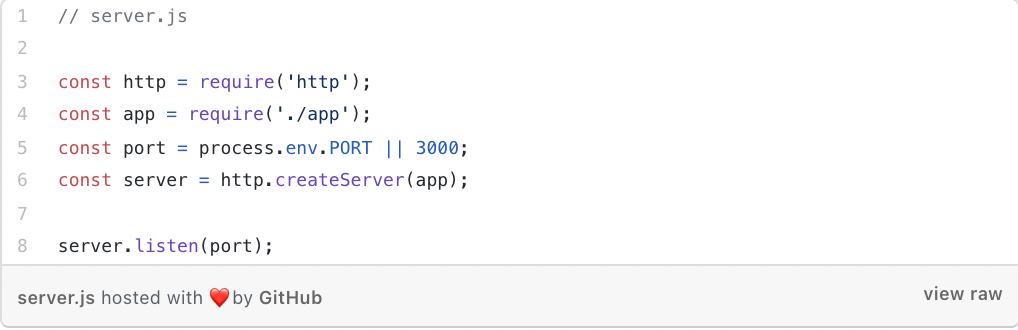
Paste the following code into new files you have created named app.js and server.js.
Once the code is loaded, the server should be ready to function the way we want it to, so all we have to do is navigate back to package.json file, under the heading scripts, and insert this line.
's Äö√Ñ√∫start's Äö√Ñ√π: 's Äö√Ñ√∫nodemon server.js's Äö√Ñ√π
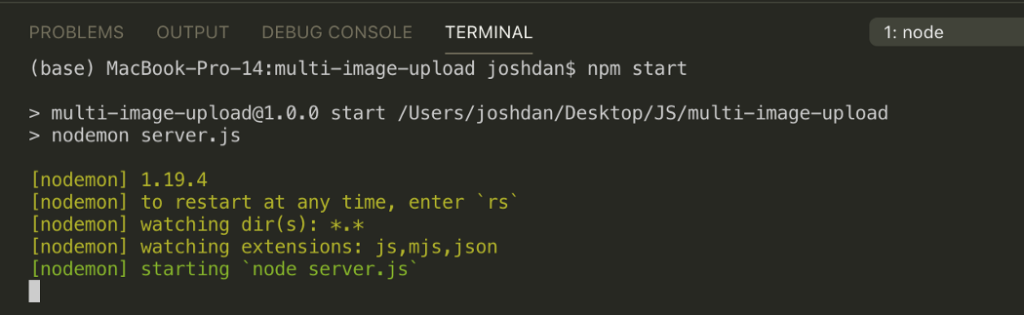
You have just added a tool, called nodemon, that functions by restarting the server each time the files are updated. To ensure that everything we have done until now is functioning properly, run the following command after you have opened the terminal.
npm start
Awesome! The server is working, so it's time to set up Multer and Cloudinary. First, in order to get started, we need to run another installation of Dotenv. As we continue working through this tutorial, you will see why we are using Dotenv, but to run it you need to input the following command.
npm install dotenv
Make a new file and call it multer.js, and insert the following code:
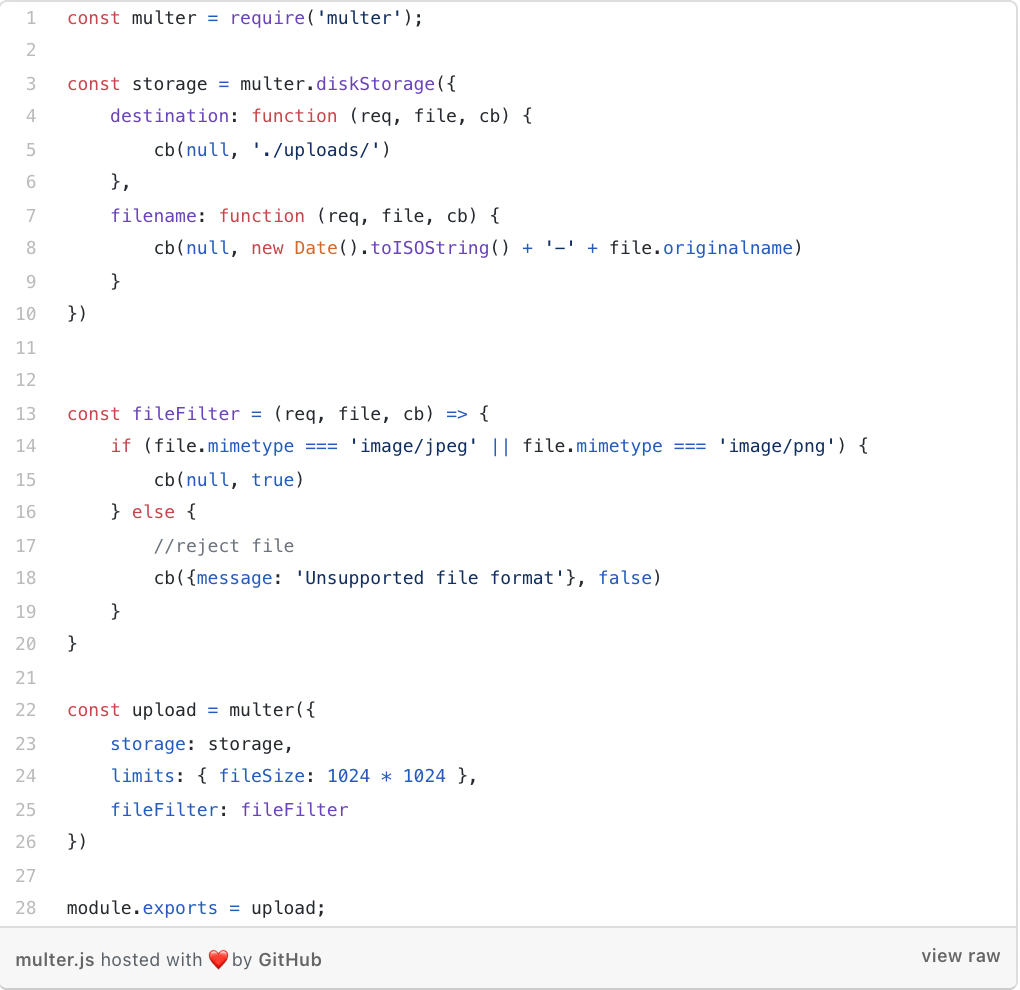
For this example we are using the uploads directory for the storage configuration of the files received by multer, so that should be factored for in the root directory. Because we only want to include .jpeg and .png files into our export, we have used the fileFilter command to limit to only these file types. Finally, we only want to upload files that are less than or equal to 1MB in size, so we have configured limits to ensure that all uploads fall within that limit.
Next we need to build the Cloudinary config file cloudinary.js so that we can include the following code.
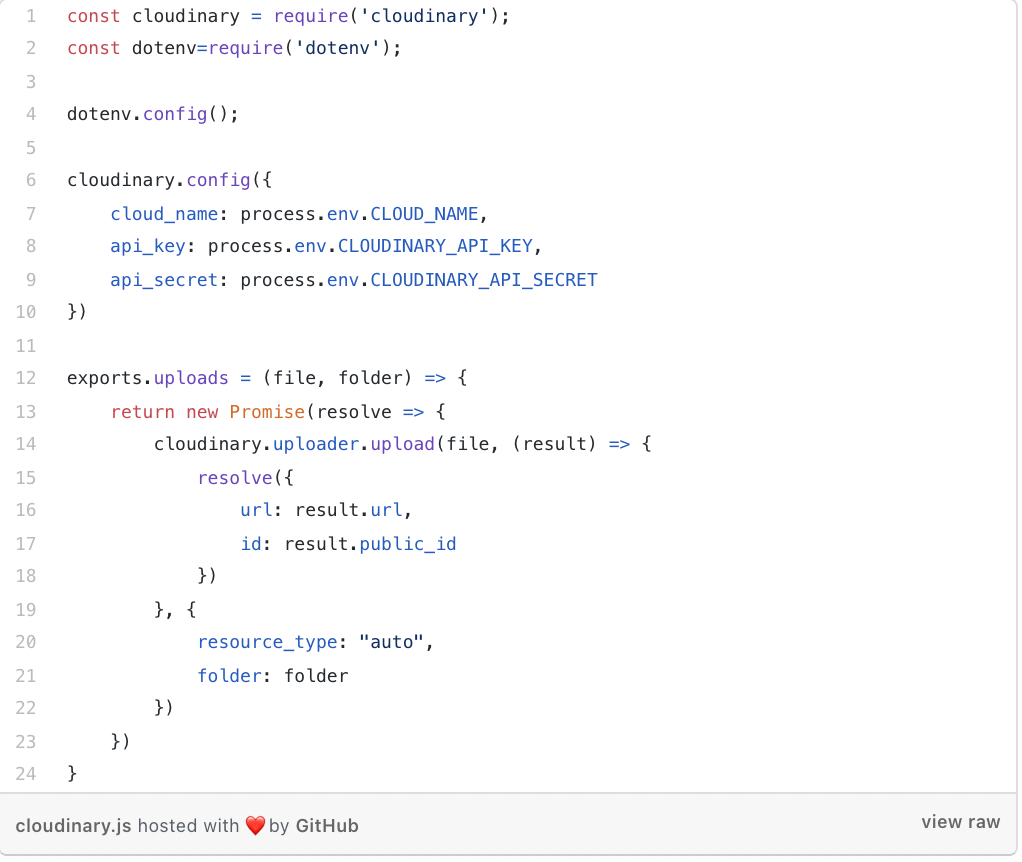
The way that we have set up the Cloudinary config method is to insert an object that contains the cloud_name, api_key and api_secret. Because all of this is sensitive information, we don't advise adding the configuration as plain text which is how the dotenv tool will aid in the process. It can use the environment tables to find the information by adding a .env file into the root directory along with this code.
CLOUD_NAME=<your_cloud_name>
CLOUDINARY_API_KEY=<your_api_key>
CLOUDINARY_API_SECRET=<your_api_secret>
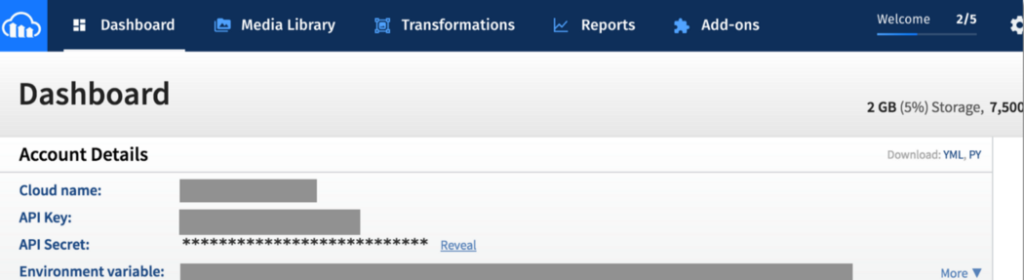
You can find each of these pieces of information within your Cloudinary dashboard. If you are having trouble, here is an image of what that looks like below.
The next function we will run is to return a promise with the url of the image as well as the public_id. We accomplish this by creating upload functions that take in a couple of arguments, file which is the path to the file on the server we are using, and folder which is the name of the location on Cloudinary where our pictures will be located after upload. Though the response from Cloudinary does not contain just these two functions, they are the only two that we need for the purposes of this tutorial.
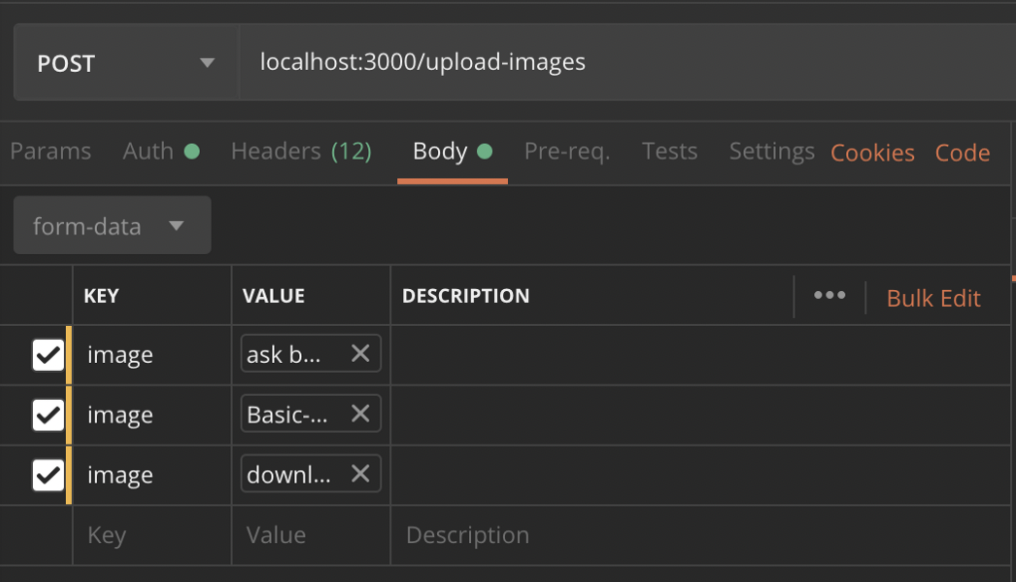
Almost done. Next we will create an endpoint where we will receive and handle our files. We will need to update our app.js file so that it looks like the one below and then I'll run through the code with you.
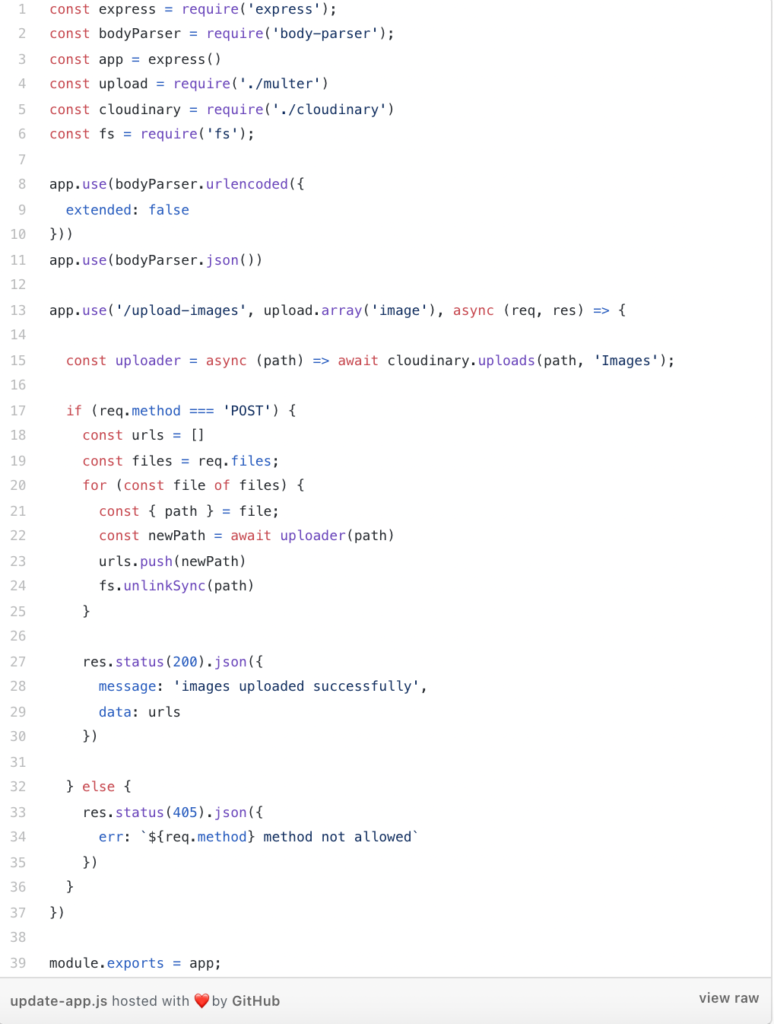
If you look at the screenshot below, you will see that we have made a route and included the Multer middleware to collect an array of each and every file with the field name image.
Then, we process through the files array and pass the path for each file into the uploader function. This will return a promise with the public_id and the url to the image that we can store in the newPath variable. Then, add each to the url array and finally you can delete each file from the server once it has been uploaded correctly.
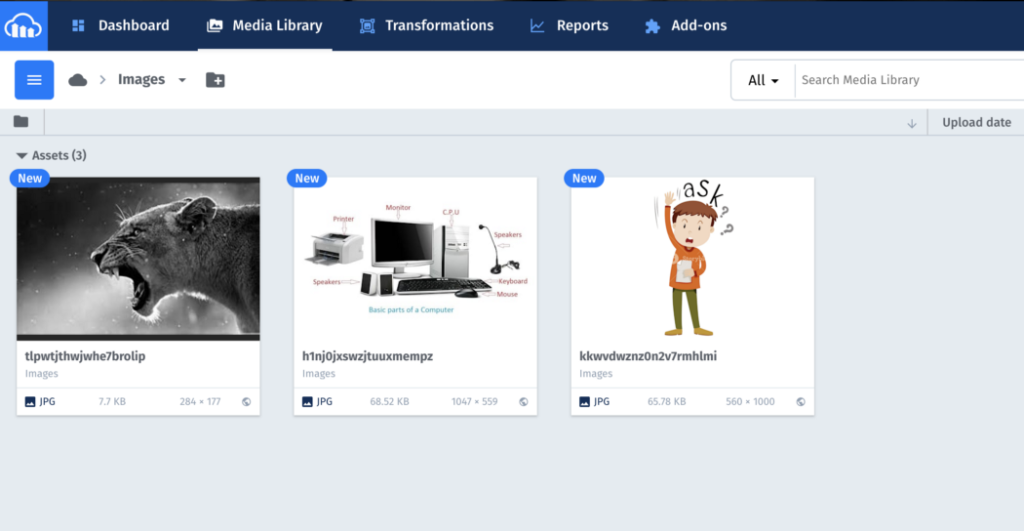
Yes! The pictures were uploaded and are now able to be viewed in the Images folder on Cloudinary.
Thank you so much for following along through this article, I hope you found all of the steps clear and the information helpful. In case you want to access all of the code used throughout this tutorial on using NodeJS and Cloudinary to upload an image file package in one place, here is a link to the Github repo where you can find that.
Happy coding!
Are you a Node.js developer interested in growing your software engineering career Apply to join the Andela Talent Network today.