Life is a continuous test of your knowledge. This tutorial delves into how to build a question-answering (quiz) application with Nuxt and Xata as the data store.
Nuxt.js is an intuitive, open source framework built on Vue that helps create performant, production-grade, full-stack web apps. And Xata is an open source serverless PostgreSQL database built for modern development that is optimized for reliability, scalability and the developer experience.
In this guide, you’ll learn how to use the Xata database to:
- Fetch questions and answers.
- Track the number of questions answered and the correct answers.
- Display the final result based on the user’s performance.
Let’s explore and create something amazing together!
Get the completed Nuxt and Xata code for this guide in this GitHub repo.
Getting Started
Before you begin, complete the following tasks to create a new Nuxt app:
Run the Nuxt command-line interface (CLI) command, which will bundle the boilerplate and its necessary dependencies to start a new project:
npx nuxi@latest init xata-quiz-appAccept the default options and follow the other instructions from the installation prompt:
cd xata-quiz-app
npm install
npm run dev
The application runs on http://localhost:3000.
Create a New Database
With the Xata CLI, install the command to connect your project code to Xata and authenticate your account to the CLI, which will generate a new database.
Next, run this command:
xata init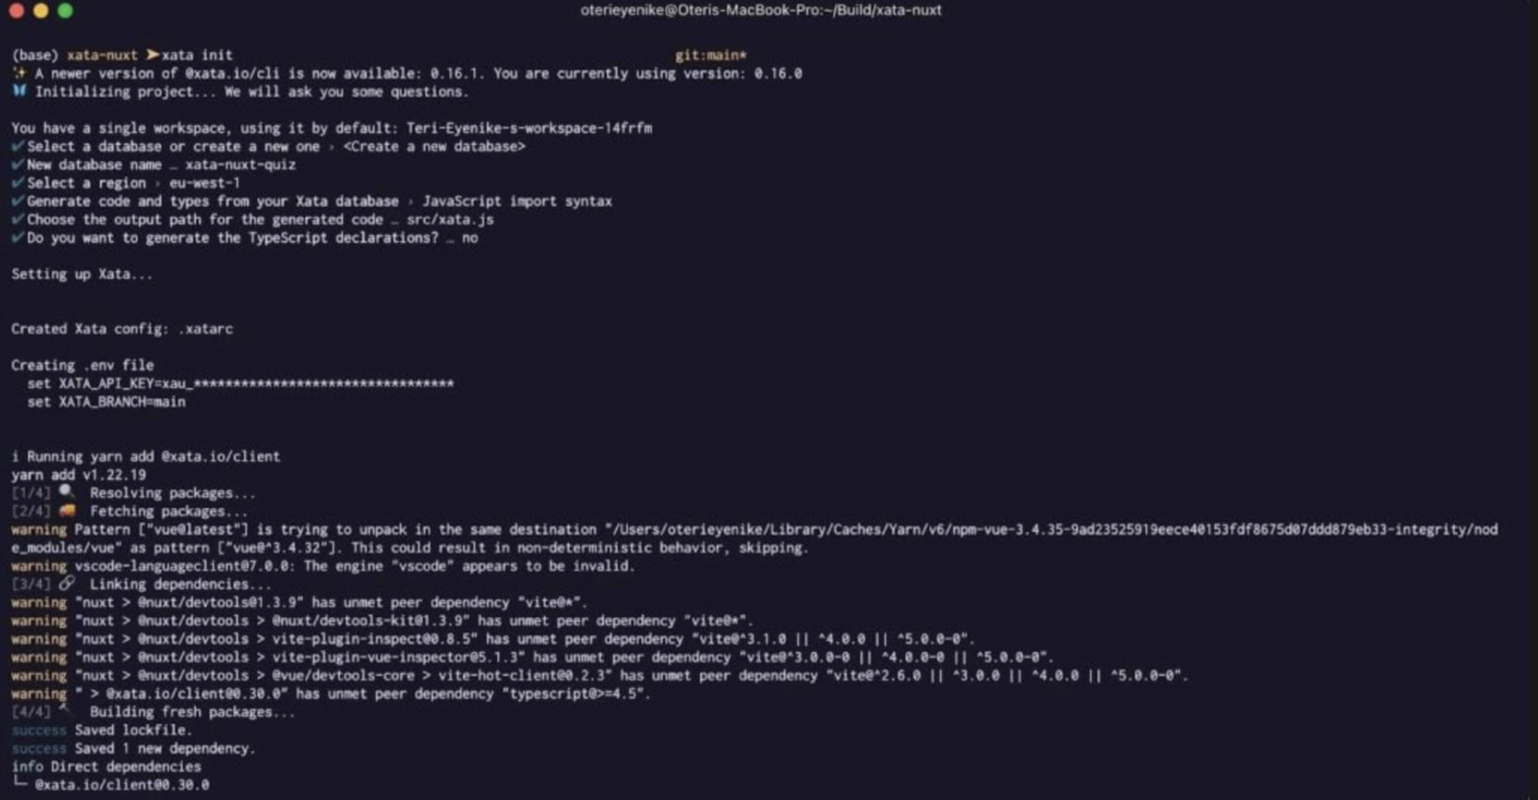
This command creates .env, .xatarc and src/xata.ts files within your root directory, and includes all necessary credentials to access your database.
Note that the data in these files is automatically generated.
Define the Database Schema
Create a new seed folder in the project’s root directory and download the questions CSV file.
There are two ways to add data with its defined schema: either manually through the Xata user interface (UI) or by using the CLI. The Xata CLI will handle the table creation and autogenerate the schema by importing the data from the terminal into the database.
curl --create-dirs -o seed/questions.csv
https://raw.githubusercontent.com/Terieyenike/xata-quiz-app/main/seed/questions.csv
Choose one of the methods above and apply it to your project. Either manually create the folder or run the command to create the CSV file in the seed folder.
Create the Other Schema
The reason for doing this is to link the answers table (which is an example of a one-to-many relationship) to the questions table, which may not be possible by importing the CSV to the Xata UI.
In your dashboard, click Tables to add the new table, called answers, to the preexisting questions table by using the + Add a table button.
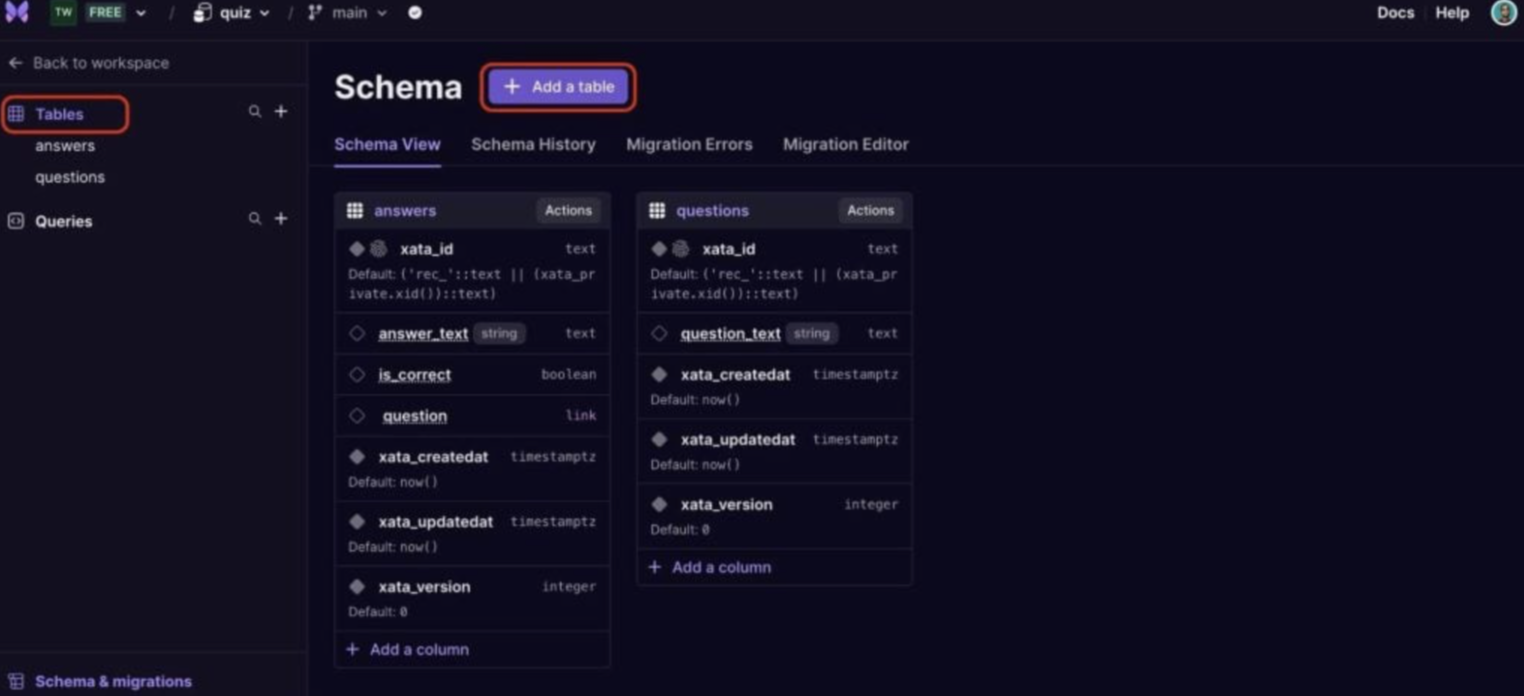
Below the answers schema, click on + Add a column to add the following columns with the following column type:
- answer_text:
text - is_correct:
boolean - question:
link; under Table to link records from in the drop-down menu, select questions from the drop-down. For the column name, type in question
To create a quiz, you need to add records to the questions and answerstables in your Xata database, as shown in this animation. Make sure to include right and wrong answers to the answers table for each question in the questions table.
With the database schema in place, generate the code that allows you to access and query the data in the Nuxt application. Run this command to apply the changes in your code:
xata pull mainThis updates the contents of src/xata.ts based on the schema defined on the main branch of your database. If you make any changes to the schema, run xata pull <branch> to update the autogenerated code.
Register the API
In the codebase, the server in the root directory is used to register APIs, which will be vital when calling the APIs in the page of your application.
Within the server directory, create a folder called api with the following files:
- answers.ts
- questions.ts
server/api/answers.ts
import { getXataClient } from "~/src/xata";

const xata = getXataClient();

export default defineEventHandler(async (event) => {
  const answers = await xata.db.answers.select(["*"]).getMany();
  return answers;
});
import { getXataClient } from "~/src/xata";
const xata = getXataClient();
export default defineEventHandler(async (event) => {
const questions = await xata.db.questions.getMany();
return questions;
});Each file imports the getXataClient function and assigns the result of calling the function with a variable named xata. The server uses the configuration sets in the .env file to read its data from the database.
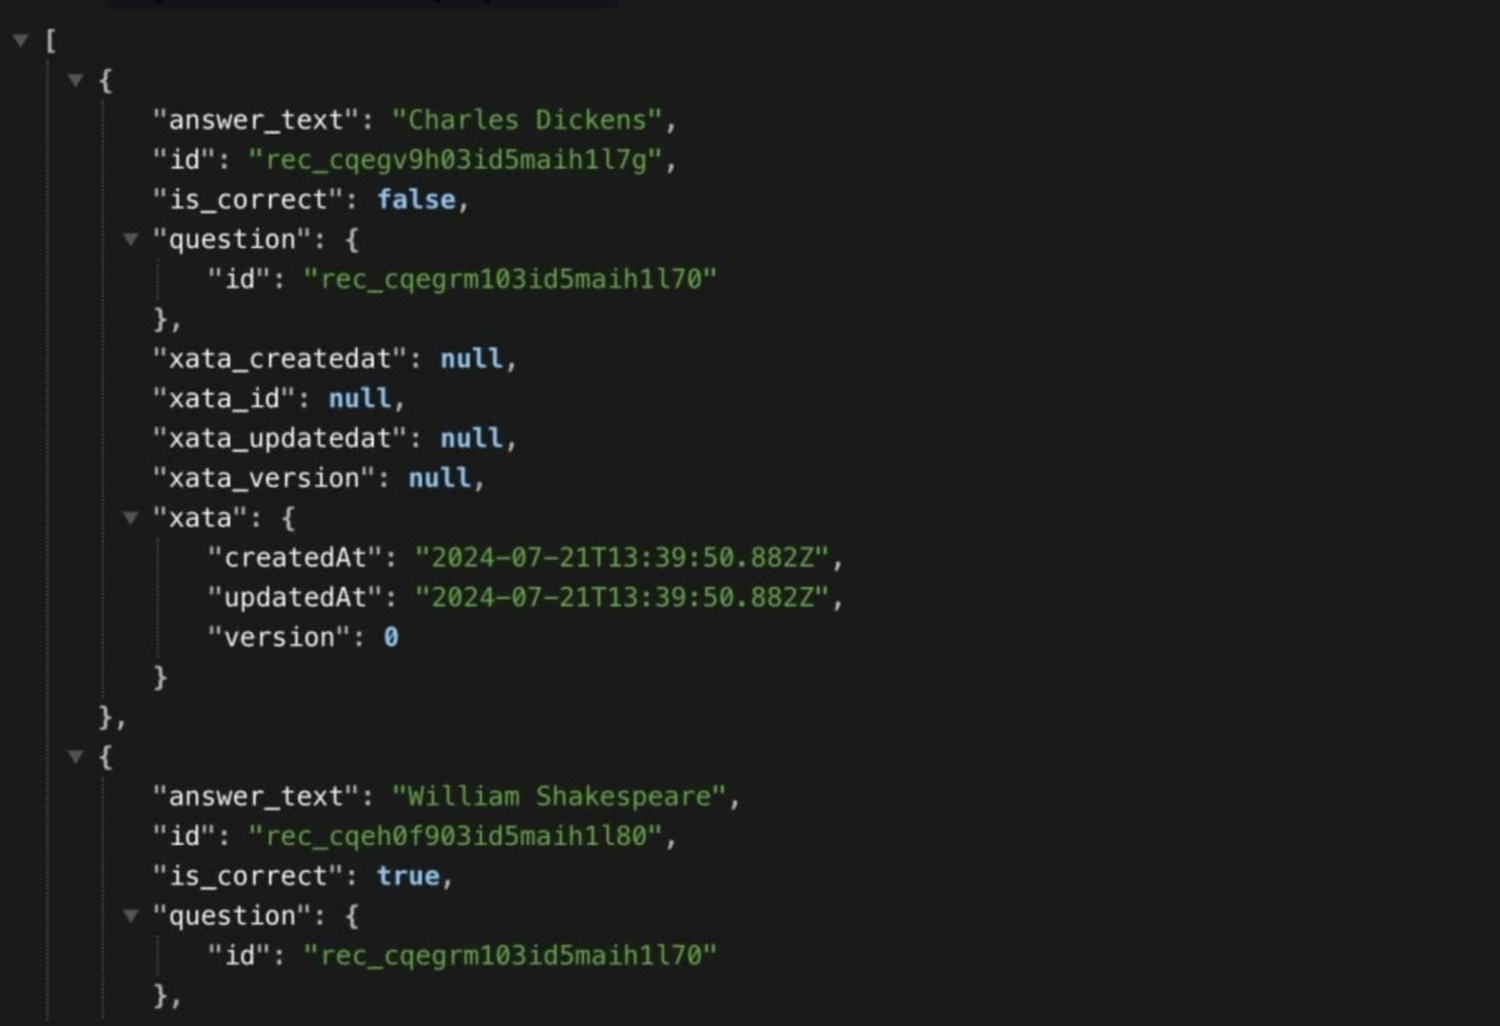
It is also important to note that the export defineEventHandler function returns the data in JSON.
To test the results in your browser, run either http://localhost:3000/api/answers or http://localhost:3000/api/questions.
Style the App
Create a file named assets/css/main.css in the root directory to contain the app’s stylesheet:
assets/css/main.css
]* {
  box-sizing: border-box;
}

body {
  font-size: 1.25rem;
  font-family: sans-serif;
  padding-top: 1.25rem;
  background: #e6ecf1;
}

.ctr {
  margin: 0 auto;
  max-width: 37.5rem;
  width: 100%;
  box-sizing: border-box;
  position: relative;
}

.questions-ctr {
  position: relative;
  width: 100%;
}

.question {
  width: 100%;
  padding: 1.25rem;
  font-size: 2rem;
  font-weight: bold;
  text-align: center;
  background-color: #00ca8c;
  color: #fff;
  box-sizing: border-box;
}

.single-question {
  position: relative;
  width: 100%;
}

.answer {
  border: 0.063rem solid #8e959f;
  padding: 1.25rem;
  font-size: 1.125rem;
  width: 100%;
  background-color: #fff;
  transition: 0.2s linear all;
}

.answer span {
  display: inline-block;
  margin-left: 0.313rem;
  font-size: 0.75em;
  font-style: italic;
}

.progress {
  height: 3.125rem;
  margin-top: 0.625rem;
  background-color: #ddd;
  position: relative;
}

.bar {
  height: 3.125rem;
  background-color: #ff6372;
  transition: all 0.3s linear;
}

.status {
  position: absolute;
  top: 0.938rem;
  left: 0;
  text-align: center;
  color: #fff;
  width: 100%;
}

.answer:not(.is-answered) {
  cursor: pointer;
}

.answer:not(.is-answered):hover {
  background-color: #8ce200;
  border-color: #8ce200;
  color: #fff;
}

.title {
  width: 100%;
  padding: 1.25rem;
  font-size: 2rem;
  font-weight: bold;
  text-align: center;
  color: #1a181b;
  box-sizing: border-box;
}

.correct {
  background-color: #12cbc4;
}

.incorrect {
  background-color: #ff6372;
}

.desc {
  border-top: 0.063rem solid #8e959f;
  padding: 1.25rem;
  font-size: 1.125rem;
  width: 100%;
  background-color: #fff;
  transition: 0.4s linear all;
  text-align: center;
}

.score {
  width: 100%;
  text-align: center;
  background-color: #fff;
  color: #5e5e5e;
  padding-bottom: 1em;
  font-size: 1rem;
}

.layout-enter-active,
.layout-leave-active {
  transition: all 0.4s;
}
.layout-enter-from,
.layout-leave-to {
  filter: grayscale(1);
}

.reset-btn {
  background-color: #ff6372;
  border: 0;
  font-size: 1.375rem;
  color: #1a181b;
  padding: 0.625rem 1.563rem;
  margin: 0.625rem auto;
  display: block;
  cursor: pointer;
}

.result {
  width: 100%;
}

.reset-btn:active,
.reset-btn:focus,
.reset-btn:hover {
  border: 0;
  outline: 0;
}

.footer {
  background-color: #f1f1f1;
  padding: 10px;
  text-align: center;
  position: fixed;
  width: 100%;
  bottom: 0;
}

.footer .container {
  max-width: 1200px;
  margin: 0 auto;
  padding: 0 20px;
  box-sizing: border-box;
}

.footer .info {
  display: flex;
  flex-direction: column;
  align-items: center;
}

.footer .info p {
  margin: 5px 0;
}

.footer .info a {
  color: #007bff;
  text-decoration: none;
}

.footer .info a:hover {
  text-decoration: underline;
}

@media (max-width: 600px) {
  .footer {
    padding: 5px;
  }

  .footer .info p {
    font-size: 14px;
    margin: 3px 0;
  }

  .footer .info a {
    font-size: 14px;
  }

  .footer .info p:nth-child(2) {
    display: none;
  }
}

@media (min-width: 601px) {
  .footer {
    padding: 20px 0;
  }
    flex-direction: row;
    justify-content: space-between;
  }
}

Now, update the nuxt.config.ts file to accept the changes globally.

nuxt.config.ts
export default defineNuxtConfig({
  devtools: { enabled: true },
  css: ["~/assets/css/main.css"],
  app: {
    head: {
      charset: "utf-8",
      viewport: "width=device-width, initial-scale=1",
    },
  },
});
Now, update the nuxt.config.ts file to accept the changes globally.
nuxt.config.ts
export default defineNuxtConfig({
  devtools: { enabled: true },
  css: ["~/assets/css/main.css"],
  app: {
    head: {
      charset: "utf-8",
      viewport: "width=device-width, initial-scale=1",
    },
  },
});
Create the Quiz Application
You’re now ready to start setting up the quiz application. Create a folder named components in the root directory and add these files: Footer.vue, Questions.vue and Result.vue.
components/Footer.vue
<template>
<footer class="footer">
<div class="container">
<div class="info">
<p>Quiz app with Xata</p>
<p>
Built with <span class="hearts">♥</span> by
<a
href="https://twitter.com/terieyenike"
target="_"
rel="noopener noreferrer"
>teri</a
>
</p>
</div>
</div>
</footer>
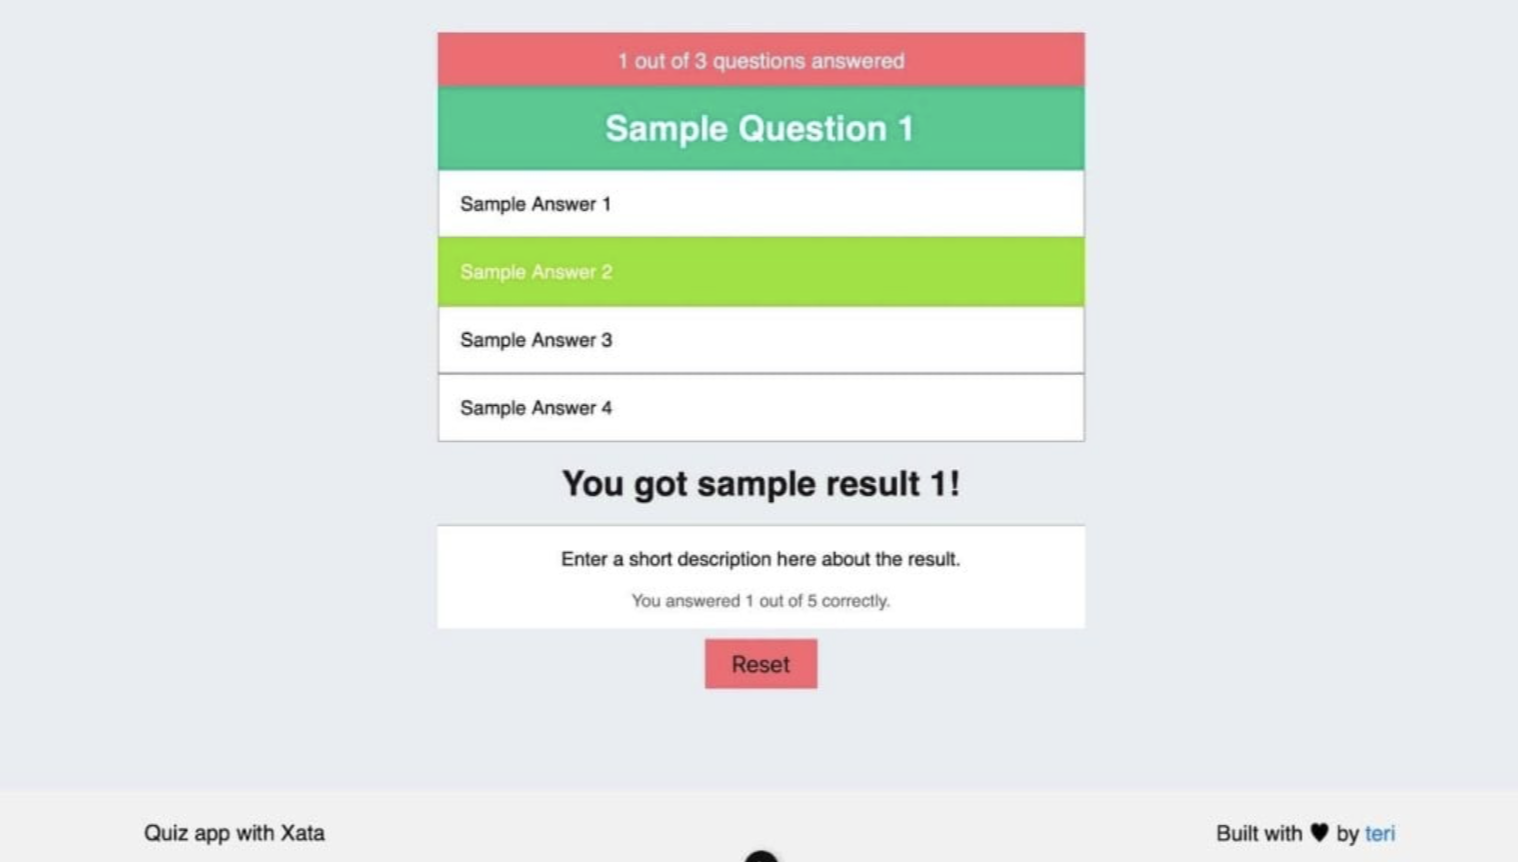
</template>components/Questions.vue
<template>
  <div class="questions-ctr">
    <div class="progress">
      <div class="bar"></div>
      <div class="status">1 out of 3 questions answered</div>
    </div>
    <div class="single-question">
      <div class="question">Sample Question 1</div>
      <div class="answers">
        <div class="answer">Sample Answer 1</div>
        <div class="answer">Sample Answer 2</div>
        <div class="answer">Sample Answer 3</div>
        <div class="answer">Sample Answer 4</div>
      </div>
    </div>
  </div>
</template>
components/Result.vue
<template>
  <div class="result">
    <div class="title">You got sample result 1!</div>
    <div class="desc">Enter a short description here about the result.</div>
    <div class="score">You answered 1 out of 5 correctly.</div>
  </div>
</template>
To see the result in the browser, create a new folder called pages; in it, create a file called index.vue with the following contents:
pages/index.vue
<script setup>
useSeoMeta({
  title: "Quiz - QA app",
  ogTitle: "Quiz - QA app",
  description:
    "Let's test your knowledge with our engaging and challenging quiz app.",
  ogDescription:
    "Let's test your knowledge with our engaging and challenging quiz app.",
  ogImage:
    "https://res.cloudinary.com/terieyenike/image/upload/v1720489148/quiz_vyvk4d.png",
  twitterCard: "summary_large_image",
});

const results = [
  {
    min: 0,
    max: 2,
    title: "Try again!",
    desc: "Do a little more studying and you may succeed!",
  },
  {
    min: 5,
    max: 5,
    title: "Wow, you're a genius!",
    desc: "Studying has definitely paid off for you!",
  },
];
</script>

<template>
  <main>
    <div class="ctr">
      <Questions />
      <Result />
      <button type="button" class="reset-btn">Reset</button>
    </div>
    <Footer />
  </main>
</template>
The useSeoMeta composable helps you define your site’s SEO with details that can be found in every modern web app or website, such as title, description, open graph (OG) image, description for social media and so on.
In addition, the results array of objects will be shown only when the user completes the quiz, to report the number of answers the user got right with their respective title and description.
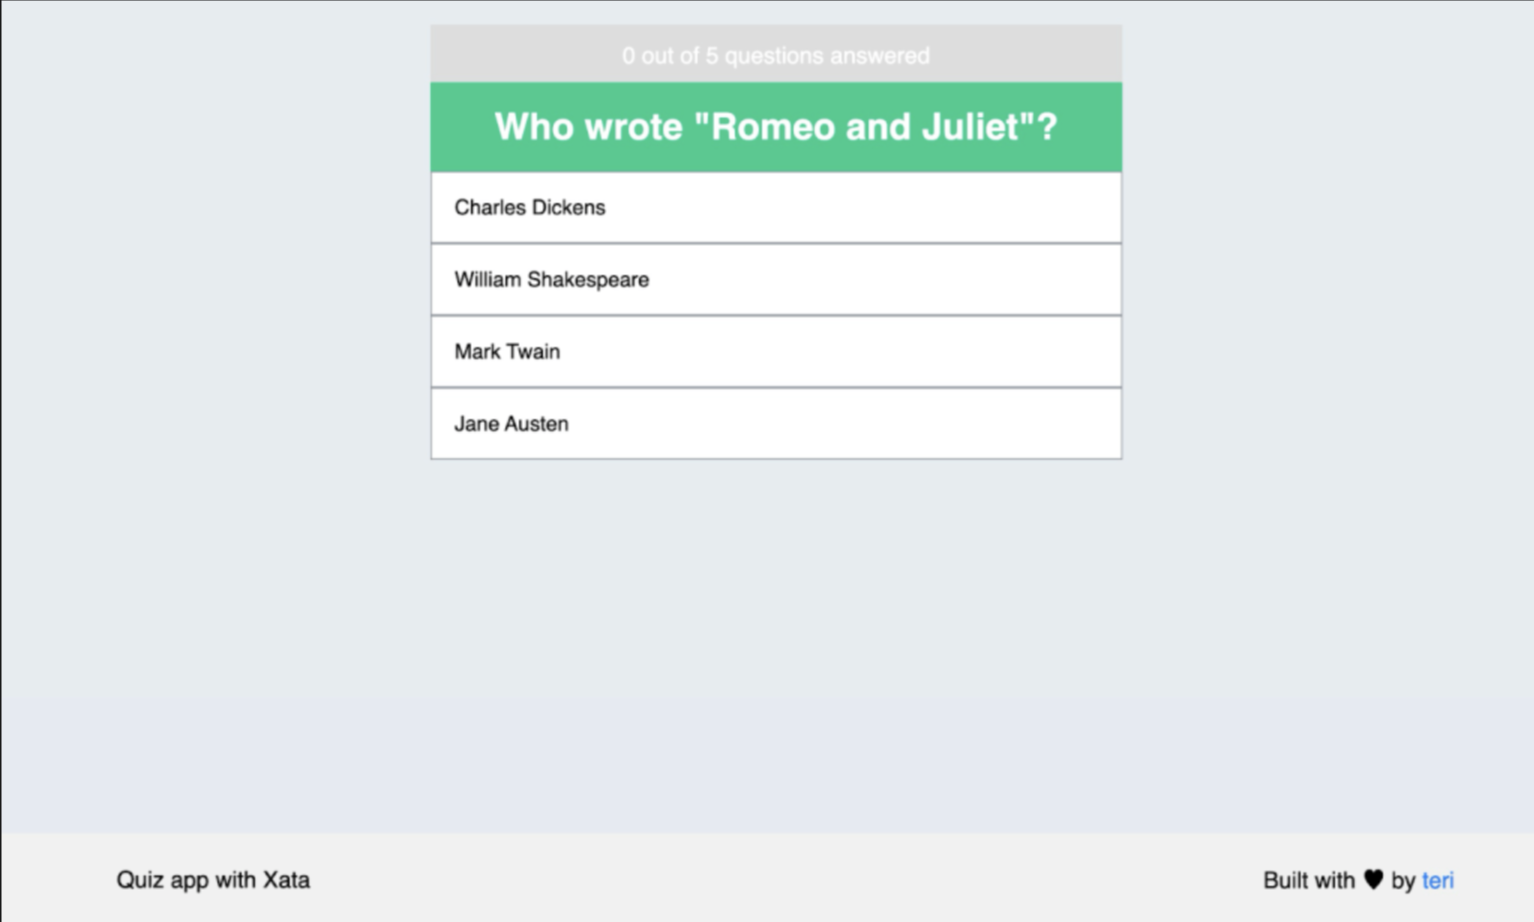
So far, the page looks like this:
Render the Questions
Before you render the questions from the database, update the home page:
pages/index.vue
<script setup>
useSeoMeta({
  …
});

const questionsAnswered = useState("questionsAnswered", () => 0);
const totalCorrect = useState("totalCorrect", () => 0);

const { data: questions } = await useFetch(`/api/questions`);
const { data: answers } = await useFetch(`/api/answers`);

const numQuestions = questions.value.length

const results = [
  …,
{
    min: numQuestions,
    max: numQuestions,
    title: "Wow, you're a genius!",
    desc: "Studying has definitely paid off for you!",
  },
];
</script>

<template>
  <main>
    <div class="ctr">
      <Questions
        v-if="questionsAnswered < questions.length"
        :questions="questions"
        :answers="answers" />
      <Result v-else />
      <button type="button" class="reset-btn">Reset</button>
    </div>
    <Footer />
  </main>
</template>
To keep track of how many questions and answers the player gets correct, define the state with a default value 0 with the useState composable. Also, import the questions and answers API endpoints with the useFetchcomposable.
In the Questions component, using the v-if directive with questionsAnswered < questions.length states that if the questions answered are less than the question’s length, show the questioncomponent; otherwise, show the Result component with the v-elsedirective. Finally, apply the attributes :questions and :answers and bind them to the questions and answers array objects.
The numQuestions variable counts the length of the questions array.
components/Questions.vue
<script setup>
const props = defineProps({
  questions: Array,
  answers: Array,
});

const getAnswersForQuestion = (questionId) => {
  return props.answers.filter((answer) => answer.question.id === questionId);
};
</script>

<template>
  <div class="questions-ctr">
    <div class="progress">
      <div class="bar"></div>
      <div class="status">1 out of 3 questions answered</div>
    </div>
    <div
      class="single-question"
      v-for="question in questions"
      :key="question.id">
      <div class="question">{{ question.question_text }}</div>
      <div class="answers">
        <div
          class="answer"
          v-for="answer in getAnswersForQuestion(question.id)"
          :key="answer.answer_text">
          {{ answer.answer_text }}
        </div>
      </div>
    </div>
  </div>
</template>
The updated code for the Result component accepts the questions and answers properties passed down from the parent component in the defineProps() macro. The getAnswersForQuestion function uses the filter method to create a new array.
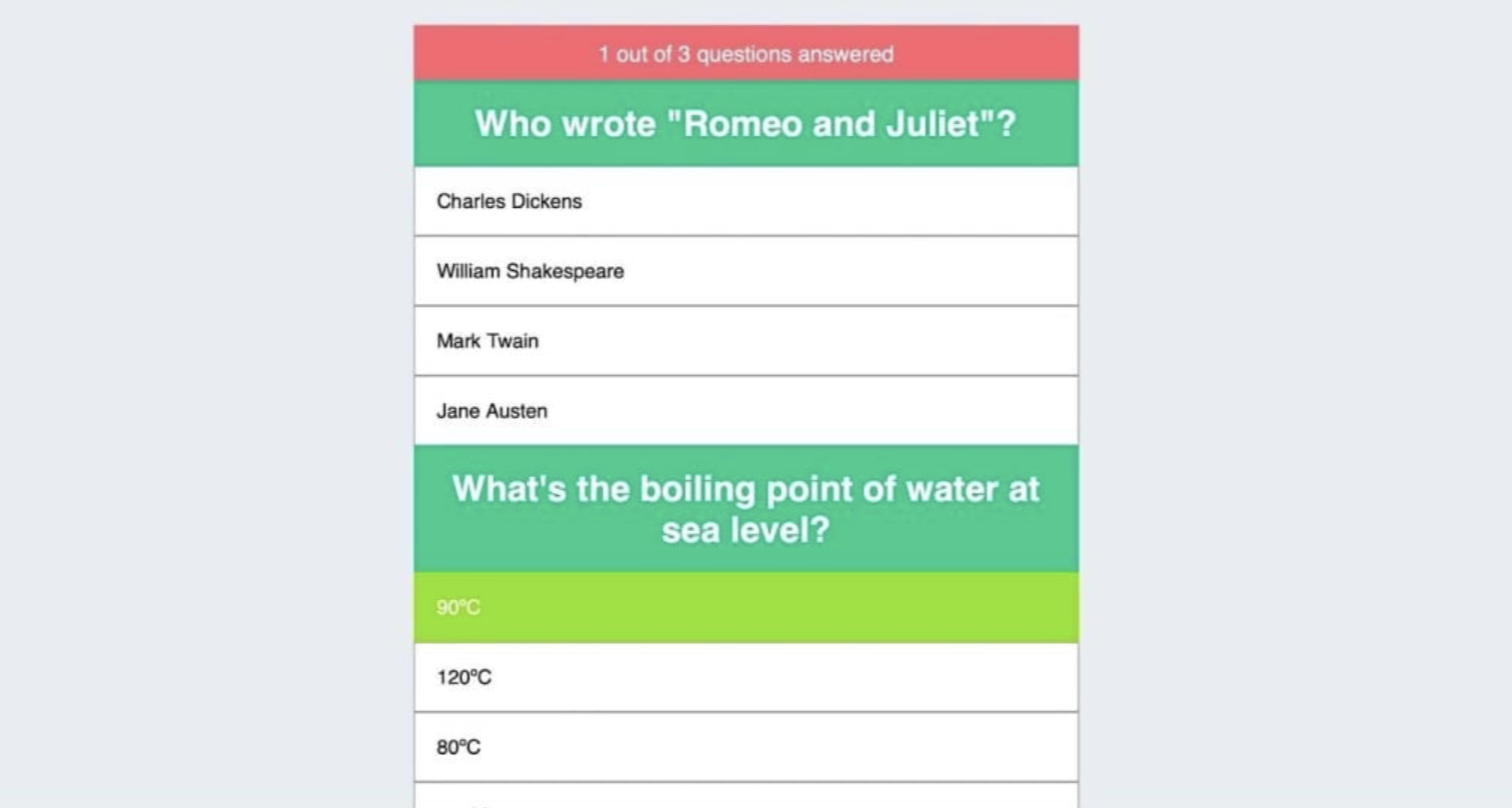
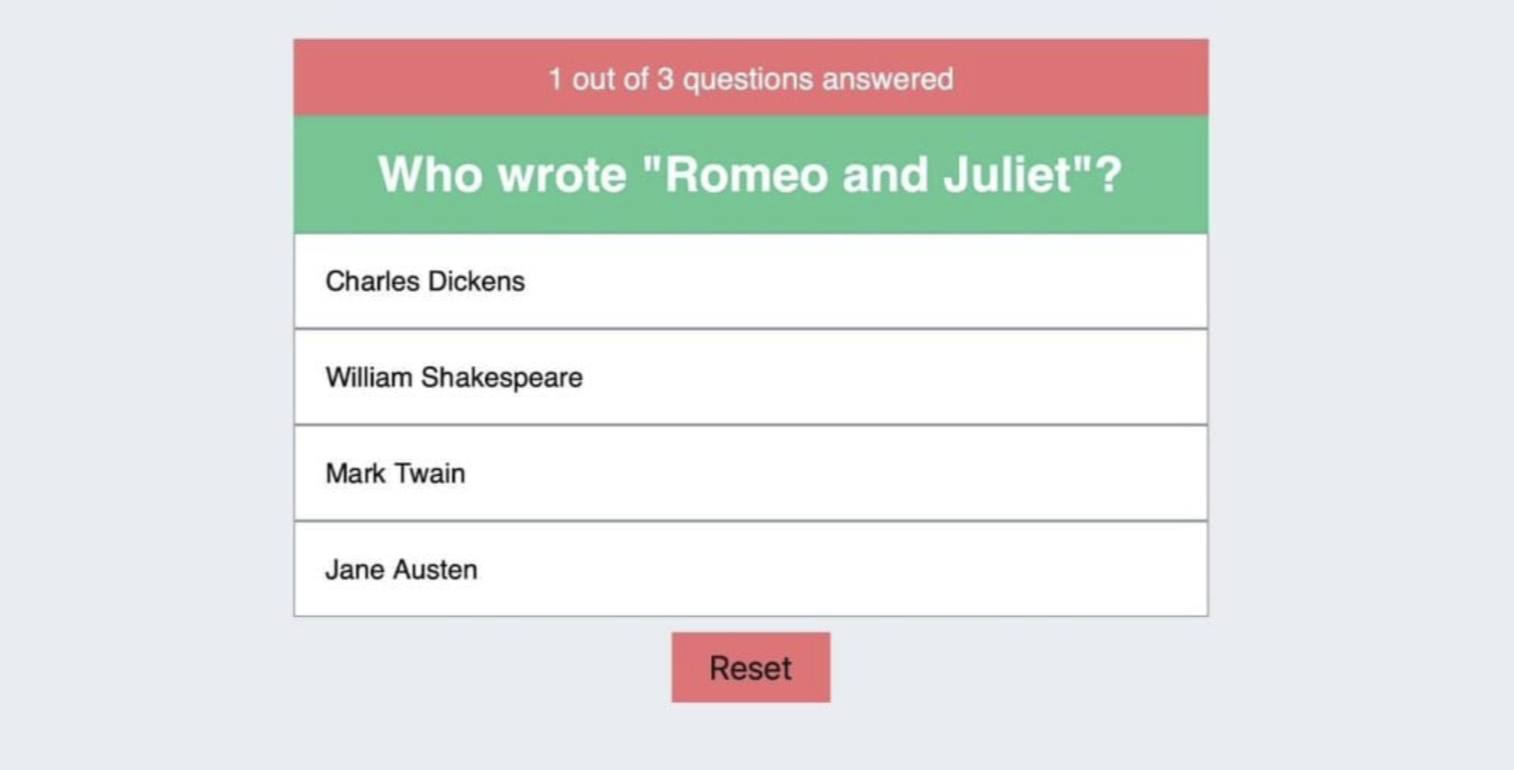
Display a Single Question
As of now, all the questions are displayed, but a better user experience is to show one question at a time.
Back in the pages/index.vue file, pass an attribute called questionsAnswered in the Questions component.
pages/index.vue
<script setup>
…
</script>

<template>
  <main>
    <div class="ctr">
      <Questions
        v-if="questionsAnswered < questions.length"
        :questions="questions"
        :answers="answers"
        :questionsAnswered="questionsAnswered" />
      …
    </div>
    <Footer />
  </main>
</template>
In the Questions.vue component, pass the props as follows:
components/Questions.vue
<script setup>
const props = defineProps({
  questions: Array,
  answers: Array,
  questionsAnswered: Number,
});

…
</script>

<template>
  <div class="questions-ctr">
    <div class="progress">
      <div class="bar"></div>
      <div class="status">1 out of 3 questions answered</div>
    </div>
    <div
      class="single-question"
      v-for="(question, qi) in questions"
      :key="question.id"
      v-show="questionsAnswered === qi">
      <div class="question">{{ question.question_text }}</div>
      <div class="answers">
        <div
          class="answer"
          v-for="answer in getAnswersForQuestion(question.id)"
          :key="answer.answer_text">
          {{ answer.answer_text }}
        </div>
      </div>
    </div>
  </div>
</template>
Check whether the current index of the questions answered in the loop matches the index in the database, using the v-show attribute with the qiin the v-for.
Listen to Clicks
You still have a static page that’s not interactive to a user’s clicks. To keep track of the correct answer, you have to pass the selected answer to the parent component.
Update the Questions.vue component:
components/Questions.vue
<script setup>
…

const selectAnswer = (is_correct) => {
  emit("question-answered", is_correct);
};
</script>

<template>
  <div class="questions-ctr">
    <div class="progress">
      <div class="bar"></div>
      <div class="status">1 out of 3 questions answered</div>
    </div>
    <div
      class="single-question"
      v-for="(question, qi) in questions"
      :key="question.id"
      v-show="questionsAnswered === qi">
      <div class="question">{{ question.question_text }}</div>
      <div class="answers">
        <div
          class="answer"
          v-for="answer in getAnswersForQuestion(question.id)"
          :key="answer.answer_text"
          @click.prevent="selectAnswer(answer.is_correct)">
          {{ answer.answer_text }}
        </div>
      </div>
    </div>
  </div>
</template>
The selectAnswer() function passes a parameter with the boolean value is_correct and receives an emit event with the value question-answered. Vue requires you to add the emit option, which lets you know what custom events will be emitted from the component.
In the home component, index.vue, pass the event in the Questionscomponent with the questionAnswered function, which is responsible for incrementing both the value of totalCorrect (answer) and the questionsAnswered (questions) on the user’s click.
pages/index.vue
<script setup>
…

const questionAnswered = (is_correct) => {
  if (is_correct) {
    totalCorrect.value++;
  }
  questionsAnswered.value++;
};
</script>

<template>
  <main>
    <div class="ctr">
      <Questions
        v-if="questionsAnswered < questions.length"
        :questions="questions"
        :answers="answers"
        :questionsAnswered="questionsAnswered"
        @question-answered="questionAnswered" />
      <Result v-else />
      <button type="button" class="reset-btn">Reset</button>
    </div>
    <Footer />
  </main>
</template>
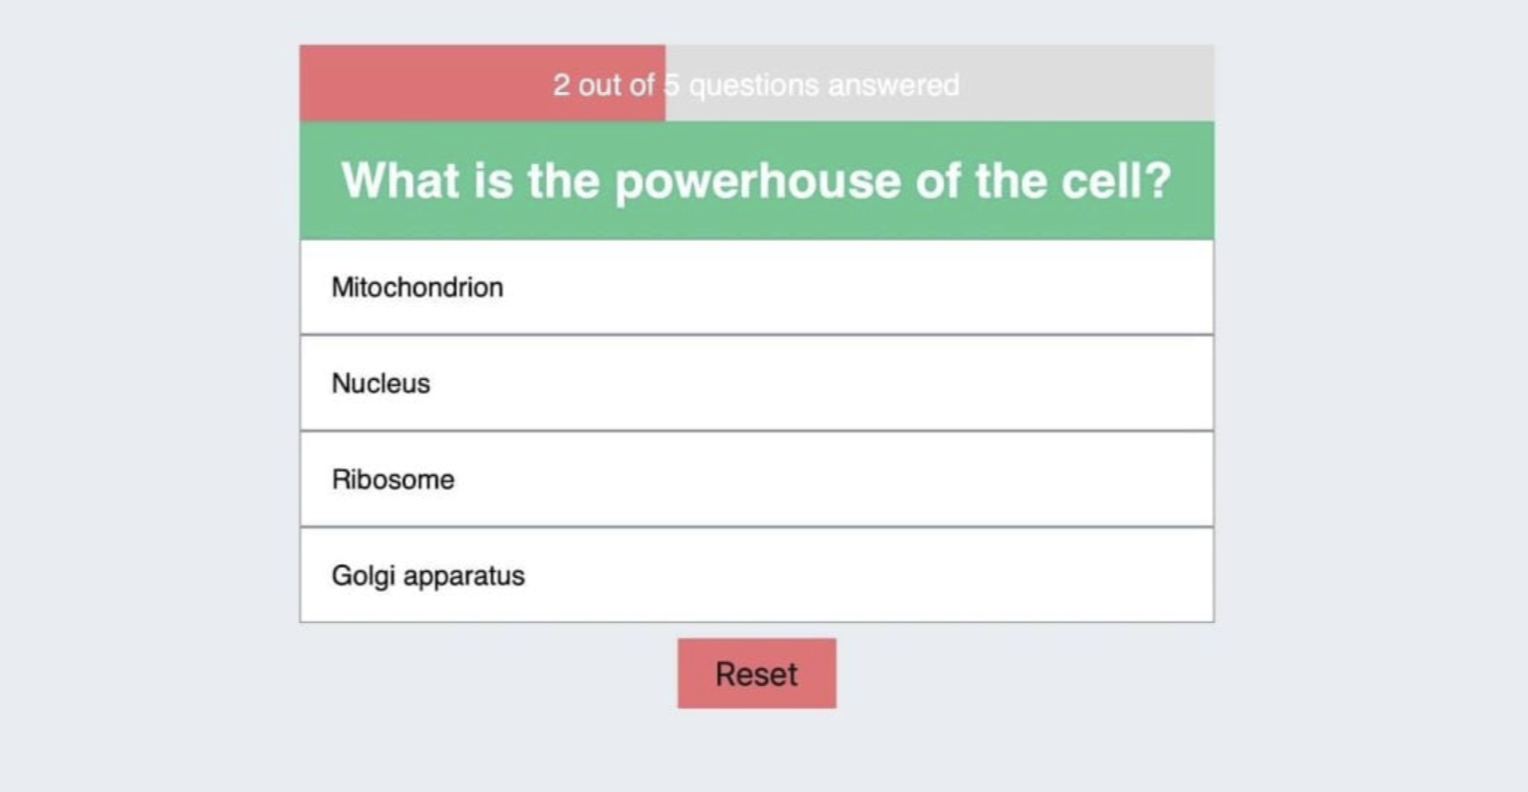
Work on the Progress Bar
When a user answers a question, the bar above the question should increase. In the Questions.vue file, use the style bindings and pass an object (:style) to handle the changes dynamically.
Also, within the status element, change the static value to its respective expressions.
components/Questions.vue
…

<template>
  <div class="questions-ctr">
    <div class="progress">
      <div
        class="bar"
        :style="{
          width: `${(questionsAnswered / questions.length) * 100}%`,
        }"></div>
      <div class="status">
        {{ questionsAnswered }} out of {{ questions.length }} questions answered
      </div>
    </div>
    <div
      class="single-question"
      v-for="(question, qi) in questions"
      :key="question.id"
      v-show="questionsAnswered === qi">
      <div class="question">{{ question.question_text }}</div>
      <div class="answers">
        <div
          class="answer"
          v-for="answer in getAnswersForQuestion(question.id)"
          :key="answer.answer_text"
          @click.prevent="selectAnswer(answer.is_correct)">
          {{ answer.answer_text }}
        </div>
      </div>
    </div>
  </div>
</template>
Enable Quiz Reset
Upon reaching the end of the quiz, it would be nice for a user if they could click the reset button and return to the first question. In the index.vuecomponent, add:
pages/index.vue
<script setup>
…

const reset = () => {
  totalCorrect.value = 0;
  questionsAnswered.value = 0;
};
</script>

<template>
  <main>
    <div class="ctr">
      <Questions
        v-if="questionsAnswered < questions.length"
        :questions="questions"
        :answers="answers"
        :questionsAnswered="questionsAnswered"
        @question-answered="questionAnswered" />
      <Result v-else />
      <button
        type="button"
        class="reset-btn"
        v-if="questionsAnswered === questions.length"
        @click.prevent="reset">
        Reset
      </button>
    </div>
    <Footer />
  </main>
</template>
The Reset button element contains the condition that states that if the number of questions answered is equal to the length of the questions in the database, the user should be returned to the first question.
Calculate the Result
The quiz result is essential for the user to know their score.
Update the index.vue component and pass the following in the <Result />component:
pages/index.vue
…

<template>
  <main>
    <div class="ctr">
      …
      <Result
        v-else
        :results="results"
        :totalCorrect="totalCorrect"
        :questionsAnswered="questionsAnswered" />

      …
    </div>
    <Footer />
  </main>
</template>
Next, update the Result component with the following:
components/Result.vue
<script setup>
const props = defineProps({
  results: Array,
  totalCorrect: Number,
  questionsAnswered: Number,
});

const resultIndex = computed(() => {
  let index = 0;
  props.results.findIndex((e, i) => {
    if (props.totalCorrect >= e.min && props.totalCorrect <= e.max) {
      index = i;
    }
  });
  return index;
});

const currentResult = computed(() => props.results[resultIndex.value]);

const titleClass = computed(() => {
  return {
    title: true,
    correct: props.totalCorrect === props.questionsAnswered,
    incorrect: props.totalCorrect !== props.questionsAnswered,
  };
});
</script>

<template>
  <div class="result">
    <div :class="titleClass">{{ currentResult.title }}</div>
    <div class="desc">
      {{ currentResult.desc }}
    </div>
    <div class="score">
      You answered {{ totalCorrect }} out of {{ questionsAnswered }} correctly.
    </div>
  </div>
</template>
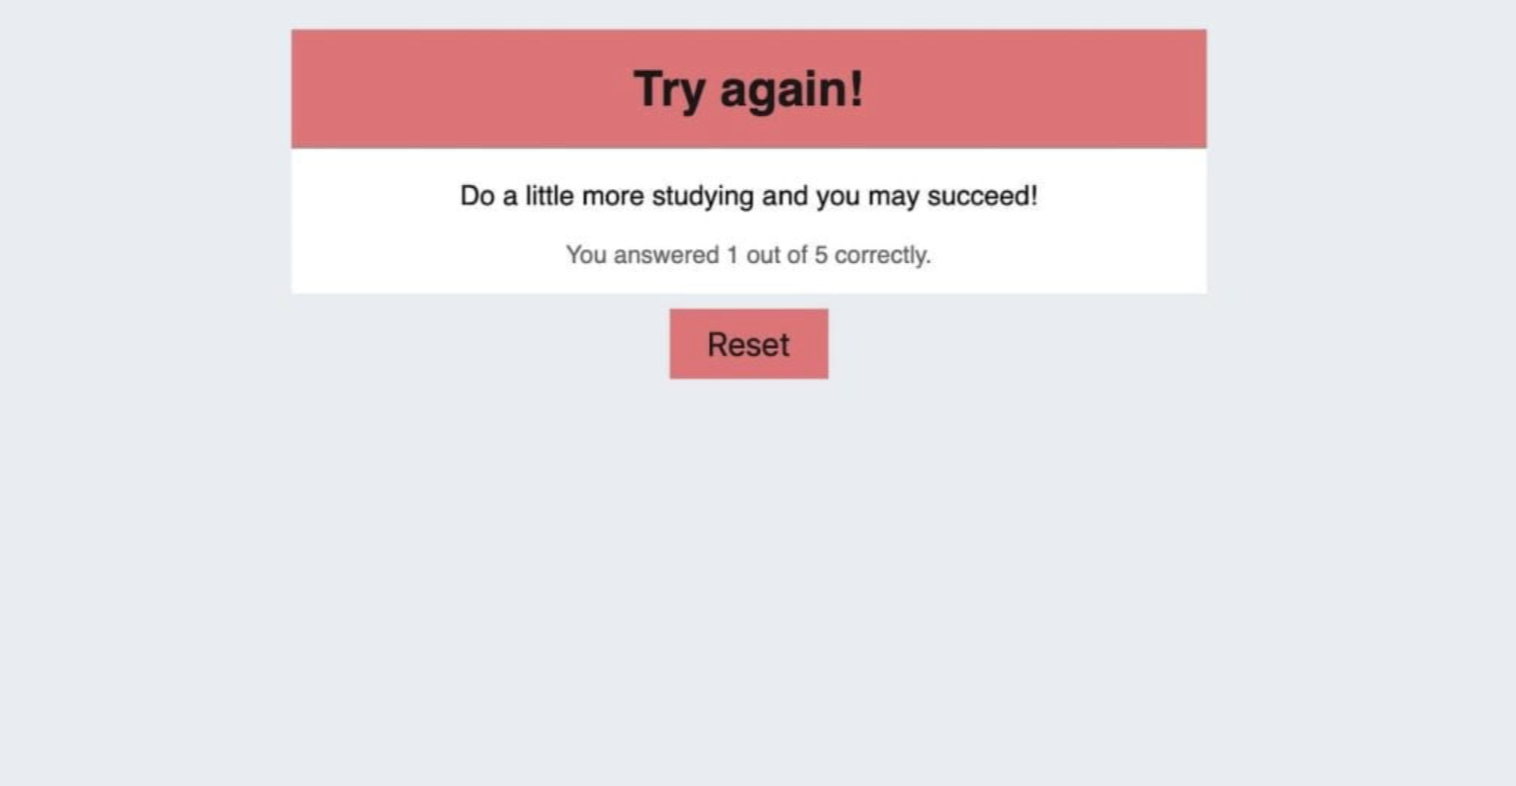
In the code block, the resultIndex uses the computed object to compare the minimum and maximum values with the user’s total number of correct answers. If both indexes are true, a result has been found. The currentResult displays the result from the results array, mapping to the index value.
Finally, the computed titleClass property changes the color of the {{ currentResult.title }} expression to either red if the user gives incorrect answers or green for the right answers.
Wrapping Up
The quiz application is a fun project that can be scaled to include other features, such as capturing data from multiple users with authentication.
This guide demonstrated the possibilities of using Xata as a backend database paired with a frontend technology, Nuxt, and its effectiveness for various applications, such as quizzes. We hope you have as much fun building quiz apps as your users will have answering the questions in them.
More Information
For further insights, explore the references below:
- Demo quiz app
- GitHub repo
- Xata docs: Import/export CSV files
- Nuxt docs: SEO and meta
- Get started with Nuxt and Xata
- Nuxt docs: Directory structure/server
- Nuxt docs: useState composable
- Nuxt docs: useFetch composable
About the Author: Teri Eyenike
Teri Eyenike is a software engineer and a member of the Andela talent network, a private global marketplace for digital talent. With more than five years of experience focused on creating usable web interfaces and other applications using modern technologies, Teri recently built a LinkTree replica app with Django that allows you to create, save and display your user profile with all your favorite links. In addition to software development, Teri is a technical writer with extensive frontend and backend development knowledge, and acts as a community manager on Discord.