How to use Django Rest Framework APIView to create a Django API - Part 1
An Application Programming Interface, or API, is a type of program which allows for communication between two separate applications. For this tutorial, we’re going to be working through how to make an API that would allow for users to access written content, just like this Andela article. To accomplish this task we will be looking at several ways to build a Django Rest Framework (DRF) API through a three step procedure beginning with a simple APIView(PART 1) then we will use GenericAPIView(PART 2) and last we will use ViewSets(PART 3).
If you want to go ahead and take a peek at the final source code for this project, you can find it on Github. Also, the development environment management (i.e. creating a virtual working environment and installing new packages) I will be using for this build is pipenv.
To begin you should create a directory in your terminal and give it any name you would like, I will be calling mine MediumClone. The command you should use to create the directory is mkdir MediumClone. Next you should input cd into the folder you just created and use the following code snippet to install Django:


Because we are using Django Rest Framework (DRF) when building our API, you should install that program into your virtual environment using the same coding format we used above.

Looks like we’re ready to start creating our first DRF API.
The first step in that process is to create a Django project. The command for making the project we will be working with is:

Next, we run a command to activate the database migrations.

Finally, we need to make sure that everything we have done to this point is functioning by running the server with this code:

We have now successfully created a Django project to integrate our DRF. To make sure your Django Rest Framework is inserted you should open the settings.py file and the code rest_framework in quotes within the installed apps.
Now that all of the components of the project are properly installed, we can move on to making an app for the project. The app we are making will be an articles app that will contain all parts of a complete article.

Once you have used the above command to create the app, go to your models.py file. This is the location where we will be making our models.

The first models you will make will look like this:

Next you will insert the following code for article models:

Then, make a superuser:

Once that is complete, login to the administration page.

In order for our models to be visible on the admin page, we need to register them by opening the admin.py file (inside the articles folder) and use the following command to register the models.

Next we need to code our endpoints.
The first endpoint we will write enables us to view all of the articles. Paste the following code into views.py:

In order for a user to have the ability to access the endpoint we just created we need to provide a URL. Make a url.py file within the articles folder. Once you have created this file, copy the code below and paste it in the file:

We also need to include the following URLs within the main URLs file:

We will be using the include Django method to insert the URLs from our articles app within the main URL configuration.

Once that step is complete, we should be able to access all of the URLs that we included in the file each time we navigate to http://127.0.0.1:8000/api/. For example, if you type in the following URL http://127.0.0.1:8000/api/articles you should receive the following response. Check it out and see what you get.

Hey, great job! You have already been able to create a functional endpoint where we can access all articles in the database, that’s awesome.
Unfortunately, all we were able to deliver is an empty list because we don’t have any articles in our database yet. We already did some of the work of correcting this problem because we added Article and Author to the admin page. One of the reasons we did this is so that we could add Authors and Articles directly to the database from the admin page. Go ahead and try it by adding an Article and Author from your admin page.


You may have noticed that when you added some authors and articles, the resulting view isn’t aesthetically pleasing.
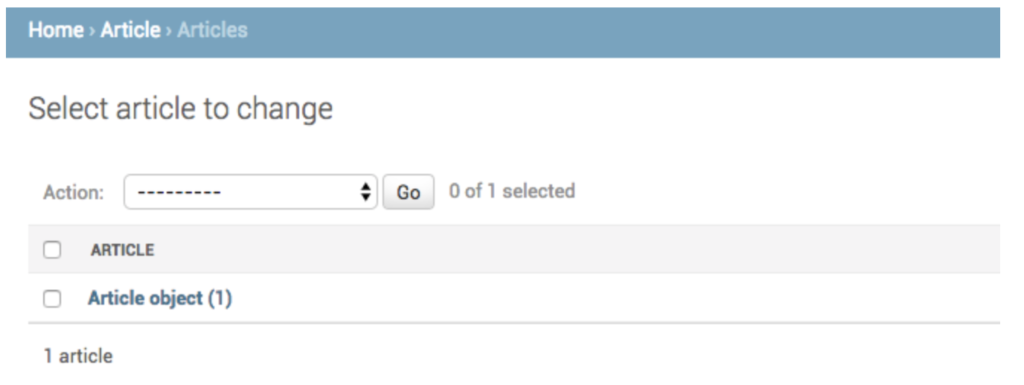
For example, the term Article object (1) doesn’t really describe the article, so let’s change it to something a little better like the name of the article. To accomplish this, we should navigate back to our models.py and insert the method _str_. This method should deliver a readable representation of a specific Article object.

After I have added the _str_ method to my Article class, the result should look something like:

Repeat these steps in the Author class so that you can achieve the same result.
Now that there are a few Articles in the database, let’s check our endpoint again to see if it is working correctly. Type in the URL http://127.0.0.1:8000/api/articles.
Oh man, that doesn’t look right!

After all that hard work, all we get is a TypeError! You have to be kidding! But don’t give up just yet, it looks like the error message is because of this line return Response ({“articles”:articles}). It looks like the list of articles we input into the database is attempting to be serialized/converted to JSON from an object. The reason we are seeing the above error message is because we didn’t provide a class to serialize the Article object.
In order to fix this issue you need to learn about Serializers.
Serializers are used to convert complex data sets like querysets and model instances into native Python data types so that they can easily be rendered as JSON, or XML (along with other) data types.
Now that we know the purpose of serializers, we can use this feature to change our articles into a python list that will be deliverable to users of our app. Create a file called serializers.py within our articles folder and insert the following code into the new folder.

Notice that we aren’t serializing the user at this point, we will cover that step a little later. The next thing you should do is to insert the serializer in our views and then request that the view serialize all of the articles. This code will show you how to do this step:

Now try to run your server again then navigate to http://127.0.0.1:8000/api/articles/. Here is what I see:

Earlier we allowed articles and authors to be created on the admin page, but we don’t want to limit this functionality to only the admin page because not every user who creates articles will have access to the admin dashboard. To fix this issue, we can code a new endpoint that will provide a place for users to create articles. We could use the same method we did earlier and create an additional class with a post method to register into our URLs, but a much easier way that doesn’t require making a brand new class and endpoint is to use APIViews. It is a function that allows you to assign multiple HTTP methods for any given class. So, we will now add a post method within our ArticleView by using this code:

Notice that we are creating an article using the article data received from users by using the serializer that we made earlier. If you’ll recall, we mentioned that the author’s field was being ignored by the serializer initially and therefore the author wasn’t part of our returned response. In order to have the ability for the serializer to create articles, we should add the author_id and then implement a create method so that the serializer knows what to do when the save method is input.
Take a minute to update your ArticleSerializer file to look like this one:

Since you have already used the admin dashboard to simulate an author, you should now try out creating an article as any other article by using postman. Here’s an example of that request.

Now anyone should be able to access that endpoint and use it to create articles. At this point anyone would be able to input a new article they wrote into the database, later in the tutorial we will change this feature.
We should also consider the fact that sometimes articles are uploaded that have mistakes or typos that would require a change. If that were to happen on our platform does a user need to replace the article. No, we will make sure that a user will have the ability to update their article.
We will need to update our articles endpoint so that users can input a PUT request for that article and at that point they will be able to change their work. We will start the update by adding a new path into the article urlpatterns.

Now we should add an update to our serializer so that the update will be done for us. Your code following the update will look something like this.

What happens with this new update feature is that we pass an instance of the article. If the user who wants to update their article has changed any value within the article it will automatically update. Alternatively, if every value is the same as what is currently published, it will remain the same.
Next let’s write the code for obtaining the update request from the user followed by updating the article. First, in our ArticleView, the put method needs to be defined. We will be using an pk URL parameter which should query the Article we wish to update. This is what the put method looks like.

We will be using a partial=True command to the serializer because although we want all fields to be updated, we may not want all of them to update at the same time.
You should now have the ability to update any article in the database by sending a put request along with the update to the URL http://127.0.0.1:8000/articles/<article id> using Postman (or any other tool).
Wow, great job so far! There is one other function I’d like to address in this part of the blog post. What if you decide you don’t want any given article included in the database anymore? We will now work on adding a delete function to the API we have built. In order to do that, we will add a delete method using the APIView again. The argument for the command will be the id of the article we want to delete.

The delete method is actually a very simple command. All we are doing is looking for the article with the specified id; if it exists the method will delete the content and then return a response to the user who made the request.
Now we have a fully functional API with all major requirements (i.e. CRUD, CreateReadUpdateDelete) that we created using the Django Rest Framework.
Stay tuned for part two of this tutorial, where we will use Django Rest Framework GenericAPIView to simplify this process even further.
Happy coding!
If you found Esir’s blog useful, check out our other blog posts for more essential insights!
Are you a developer interested in growing your software engineering career? Apply to join the Andela Talent Network today.
Related posts
The latest articles from Andela.
.jpg)
Customer-obsessed? 4 Steps to improve your culture
.jpg)
How to Build a RAG-Powered LLM Chat App with ChromaDB and Python
.jpg)
Navigating the future of work with generative AI and stellar UX design
We have a 96%+
talent match success rate.
The Andela Talent Operating Platform provides transparency to talent profiles and assessment before hiring. AI-driven algorithms match the right talent for the job.